Monday, October 31, 2011

Potato and Sausage Hash


I created this recipe for a Fall Party at my work today.  I needed to bring a breakfast item that would feed a lot of people.  I wanted to make something that was hearty, warm and not your standard breakfast casserole.  I decided to create something different that i thought everyone would enjoy.  So, i came up with this recipe!  

Potato and Sausage Hash
(aka Cassie’s Casserole Concoction)

 Ingredients
4-5 lbs of potatoes (depending on how much you want to make)
5 lbs of pork sausage
3 onions
Garlic powder or minced garlic
Other variety of seasonings depending on personal taste
3 containers of shredded (not grated) Parmesan cheese
3.5 containers of Gorgonzola cheese

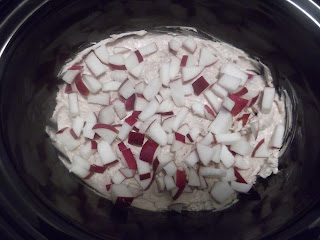
Cut potatoes in bite size chunks or like home fries.  Season with desired amount of seasoning, mix.  Dice onion and add to potatoes, mix.  Put in greased 9X13 pan or roast pan and cover.  Cook potatoes and onion at 375 degrees for about 1 hour or until potatoes are cooked all the way.  Brown sausage and drain.  Add to potatoes and mix.  Add cheeses, mix and cook until heated through and cheese is melted.

Everyone loved this recipe and it was a great success.  In fact, everyone loved it so much that they asked for the recipe.  It was the biggest hit of all the breakfast items!  You could change this recipe up a little and add egg if you wanted or you could add regular sausage and make this a non-breakfast item.  I will definitely make this again and use venison once the freezer is full from hunting season this year!  Enjoy!! 

Saturday, October 29, 2011

Pistachio Cream Cheese Fingers

I made these cookies a while ago and decided to make them again.  They are just sooo delicious!  People who do not even like pistachio have fallen in love with these cookies.  They are a soft delicate cookie that keeps everyone wanting more! 
 Pistachio Cream Cheese Fingers  
Prep time: 30 min           Cook time: 12 min            Yields: 8 dozen
  • 1 cup butter, softened
  • 1 cup white sugar
  • 1 (8 ounce) package cream cheese, softened
  • 1 egg
  • 1 teaspoon vanilla extract
  • 2 1/4 cups all-purpose flour
  • 1 (3 ounce) package instant pistachio pudding mix
  • 1 teaspoon baking powder
  • 1/2 teaspoon salt
  • 3 (1 ounce) squares semisweet chocolate
  • 1 teaspoon shortening
In a large bowl, cream together the butter, sugar, and cream cheese until light and fluffy. Beat in the egg and vanilla. Combine the flour, dry pudding mix, baking powder, and salt; stir into the creamed mixture. Cover dough, and refrigerate for at least one hour for easier handling.
Preheat oven to 350 degrees F (175 degrees C). Grease cookie sheets. Shape teaspoonfuls of dough into finger shapes, about 1 1/2 inches long. Place cookies on prepared cookie sheets.
Bake for 9 to 12 minutes in the preheated oven, or until set and very lightly browned on bottoms. Cool completely on a wire rack In small saucepan over low heat, melt together chocolate and shortening, stirring constantly until smooth and well blended. Drizzle a small amount of chocolate over each cookie. Allow the chocolate to set before storing. 

 
The only problem I have with these cookies is that i always make them too big!  I typically make them 2-3 times the size of what they are supposed to be.  They are quite delicious in the bigger size.  The only problem with this is that you will not get the desired dozen if you make them larger.  These are a great cookie for Christmas because they are green and also a fun cookie to make for Halloween as they can be turned into a finger or a caterpillar!  Enjoy!

Monday, September 26, 2011

Tortialla Roll-Ups

I had to go to a Bar-B-Que and couldn't decide what to bring.  My boyfriend suggested we make tortilla roll-ups because they are easy to make and a finger-food.  People could just grab them and go!  They didn't need to be refrigerated or kept warm.  We ended up making several different kinds.  Some things i dont have measurements on so be creative with your own that you make!

Ham Ranch Tortilla Roll-Ups

2 (8 ounce) packages cream cheese, softened
1 (1 ounce) package ranch salad dressing mix
3 green onions, chopped
11 (8 inch) flour tortillas
22 thin slices deli ha

In a small mixing bowl, beat the cream cheese and salad dressing mix until smooth. Add onions; mix well. Spread about 3 tablespoons over each tortilla; top each with two ham slices. Roll up tightly and wrap in plastic wrap. Refrigerate until firm. Unwrap and cut into 3/4-in. slices. 

I did not put the onions in these ones.  I also chopped up the ham into pieces and added shredded cheddar cheese.


Taco Tortilla Roll-Ups

1 lb. ground beef or turkey, cooked and drained
salsa
1 8oz cream cheese, softened
1 pkg taco seasoning
cheddar cheese


Cook meat until no longer pink, drain.  Combine cream cheese and taco seasoning.  Spread tortilla with cream cheese, add meat in the center followed by salsa and cheese. Roll up tightly and wrap in plastic wrap. Refrigerate until firm. Unwrap and cut into 3/4-in. slices.  The picture below does not have cheddar cheese on it as we did some with and some without.  


 Parmesan Bacon Tortilla Roll-Ups


1 8oz cream cheese, softened
bacon, cooked crisply and crumbled
onion, chopped and sauted
Parmesan cheese
parsley
garlic powder

Combine cream cheese, parsley, garlic powder and parmesan cheese.  Spread on tortilla.  Sprinkle with sauteed onion and crumbled bacon.  Roll up tightly and wrap in plastic wrap. Refrigerate until firm. Unwrap and cut into 3/4-in. slices. 


I hope you enjoy these roll-ups and have fun with them.  Create new recipes and please share them!  This is a great recipe for kids to help with as you really cannot mess up.  Everyone seemed to enjoy these as there were none left at the end of the night!  The bacon ones were the biggest hit of all!  Enjoy.


Velveeta Spicy Cheeseburger Dip

I made this dip for my mom's house warming party.  I put all the ingredients in the crock pot and left it plugged in on low the whole time!  People were able to go and get this delicious hot dip throughout the day and night!  Once people dipped into it they couldn't get enough of it!  I had a whole crock pot full (I quadrupled the recipe) and it was almost all gone! 

Velveeta Spicy Cheeseburger Dip

1 lb. Velveeta Pasteurized Cheese Product, cut into 1/2 cubes
1 can (10 oz) RO*TEL diced tomatoes and green chilies, undrained
1 Cup Shredded Low-Moisture Part Skim Mozzarella Cheese
1/2 lb. ground beef, cooked and drained
1/2 Cup sliced green onions

Microwave
Mix all ingredients except the onions in large microwaveable bowl.
Microwave on High 5 min. or until Velveeta is completely melted, stirring after 3 min.  Stir in onions.
Serve with assorted cut-up fresh vegetables.

 Stove
Mix all ingredients except onions in medium saucepan.  Cook on medium heat 5-7 minutes or until Velveeta is completely melted, stirring frequently.  Stir in onions.

Makes 4 1/2 Cups or 36 servings, 2 Tbsp. each.

Like i said, i made this in the crock pot.  I threw all the ingredients in and just kept stirring until the cheese was melted and it was hot.  I didn't add the green onions and there was nothing lacking because of it.  I also used Scoops tortilla chips and Hint of Pepperjack tortilla chips to dip with instead of veggies!  This dip was awesome and a crowd pleaser!  I will definitely make this again.  Enjoy!

Quick Tater Tot Bake

My boyfriend loves tater tots (and so do I!  who doesn't?)!  I also tried out this new recipe because a guy he works with loves tater tots!  This was quick and easy and an awesome recipe for kids!  Its a hearty meal that you can add or change things about it.

Quick Tater Tot Bake
Prep: 10 minutes          Bake 30 minutes

3/4 to 1 lb. ground beef or turkey
1 small onion chopped
salt and pepper to taste
1 pkg. (16 oz) frozen Tater Tot potatoes
1 can (10 3/4 oz) condensed cream of mushroom soup, undiluted
2/3 Cup cold milk or water
1 Cup (4 oz) shredded cheddar cheese

In a large skillet, cook beef and onion over medium heat until no longer pink; drain.  Season with salt and pepper. 
Transfer to a greased  2-qt baking dish.  Top with tater tots.  Combine soup and milk, pour over tater tots.  Sprinkle with cheese.  Bake, uncovered at 350 degrees for 30-40 minutes or until heated through.  Yields 2-3 Servings.


I did a few things differently with this recipe. I added garlic powder to the ground beef which added some extra taste.  I also used cream of chicken soup because my boyfriends co-worker is deathly allergic to mushrooms.  I would make this again and try it with mushrooms!  (Someone make this with cream of mushroom soup and let me know how it is!)  I will definitely make this again and my boyfriend and his co-worker loved it for lunch the next day!  My boyfriend said it was even better a day old because the flavors condensed together.  This is also a recipe that you could divide and freeze half if you wanted to.  You could also add vegetables to it for a complete meal!  Lastly, you can double this and put it in a 9x13 inch pan.  Enjoy!   

Hot Apple Pie Dip

I had made this dip for a Christmas party last year and I just made it again for a fall snack party at work.  This dip is amazing and quite delicious. When people hear there is cheddar cheese in it they immediately are cautious, but once they taste it, their worries go away!  The pumpkin pie spice does wonders in this dip and gives it so much flavor.

Hot Apple Pie Dip

1 8oz tub cream cheese spread ( I just use the 8oz blocks and soften them)
2 TBSP brown sugar
½ tsp pumpkin pie spice
1 apple, chopped and divided
¼ Cup. Fine cheddar cheese
1Tbsp. Pecan pieces, chopped

Preheat the oven to 400 degrees.
Combine the cream cheese, brown sugar, and pumpkin pie spice. Mix until well
blended. Add half of the chopped apples. Spread in the bottom of an 8 inch pie pan or small casserole dish.
Sprinkle with remaining apples, cheddar cheese, and pecan pieces.
Bake 10-12 minutes or until heated through. Serve with cinnamon wheat thins or pecan
wheat thins.


Makes 2 Cups of 16 servings, 2 Tbsp dip and 15 crackers each.


You can also make this in a crock pot. Prepare the same way and serve when heated
through.  You can also substitute the pumpkin pie spice with ground cinnamon.  I love this dip because its easy and warm and something different from other types of dip.  The cheese adds so much flavor without over-powering the apples.  Enjoy!   

Saturday, September 17, 2011

Crab-Stuffed Mushrooms

I made these mushrooms for a barb-b-que I went to.  These mushrooms were fun to make and absolutely delicious!  I did have to change the recipe to accommodate the amount of mushrooms i needed to make.  Everyone single one was eaten and the extra filling was used the next day on chips and more mushrooms!

Crab-Stuffed Mushrooms

Filling:
1/2 cup parsley, chopped
1/2 cup green onions, chopped
4 tablespoons parmesan cheese
1/2 cup cream cheese
1 cup crabmeat
salt
pepper
minced garlic

Directions

Preheat oven to 375 degrees.

Combine filling, stuff the mushrooms and top with bread crumbs. Use a non-stick spray to help it brown. Bake for about 20 minutes, or until it’s hot and melted.


                                          This is what was left of them after the first round.
I used a white onion instead of green onion and i used dried parsley instead of fresh. I also used 2 packages of cream cheese to make enough filling...depending on how much you want to make, i would use 1 pkg. I also used artificial crabmeat, 1 pkg of it. I didn't put breadcrumbs on top but i would next time, I would also possibly put breadcrumbs into the cream cheese mixture.  I hope you enjoy these as much as we all did!  Enjoy!

Monday, August 29, 2011

Five Layer Taco Dip

This dip is absolutely amazing!  The recipe is from Paula Deen and this truly is a crowd pleaser.  The different layers give this dip so much taste.  I like the fact that there is no lettuce in this dip like so many other taco dips.  I haven't met anyone who doesn't instantly fall in love with this.  Once you try it, you won't be able to stop eating it.  There will be no leftovers.  Its simple to make and easy to add or subtract ingredients from. 

Five Layer Taco Dip

Servings: 4 to 6

1 tablespoon olive oil
Nonstick cooking spray
1 1/2 cups crushed tortilla chips, divided
1 pound ground beef
1 (1.25-ounce) packet taco seasoning mix, or homemade Taco Seasoning, recipe follows
1 cup prepared salsa
1 cup sour cream
1 avocado, halved, peeled, pitted, and cubed
1 cup grated extra-sharp Cheddar (4 ounces)

Taco Seasoning:
1 tablespoon chili powder
2 teaspoons onion powder
1 teaspoon ground cumin
1 teaspoon garlic powder
1 teaspoon paprika
1 teaspoon dried oregano
1 teaspoon sugar
1/2 teaspoon salt

Directions

Heat the oil in a large skillet over medium-high heat. Preheat the broiler.
Spray a broiler-proof 9-inch pie plate with nonstick cooking spray. Spread 1 cup of the crushed chips over the bottom of the pie plate.
Brown the beef in the skillet, breaking it up with a fork, until the meat is no longer pink, 5 to 7 minutes. Pour off the drippings and add the taco seasoning. Continue cooking, stirring occasionally, until most of the liquid has evaporated. Transfer the meat to the pie plate, spreading it on top of the chips.
Spread the salsa over the meat and then the sour cream over the salsa. Scatter the avocado cubes over the sour cream. Top with the cheese. Broil 4 inches from the heat until the cheese is melted and bubbling, 3 to 5 minutes, watching carefully to see that the cheese doesn’t burn. Top with the remaining tortilla chips. Serve hot.

Taco Seasoning:
In a small bowl, combine the chili powder, onion powder, cumin, garlic powder, paprika, oregano, sugar, and salt. Use immediately, or store in an airtight container at room temperature for up to 6 months.


 The only thing I really do differently for this recipe is I use the already prepared taco seasoning and I really don't measure my ingredients.  Have fun and if you always measures your ingredients, don't with this one.  You cannot mess this up. You also do not need to use a round pan.  I used the pan shown in the picture above and it worked out perfect!  Enjoy!

Monday, August 15, 2011

Taco Twists

These are awesome and delicious!  I made them for some friends as a quick and easy meal.  They look elegant and hard to make, when in fact, they are not.  These taco twists are a great way to have "tacos" without the shells.  I will definitely make them again!

Taco Twists

Prep: 15 min               Bake: 20-25 min                    Yield: 12 Servings

1 lb. ground beef
1 large onion, chopped
2 C. (8oz) shredded cheddar cheese
1 jar (8oz) salsa
1 can (4oz) chopped green chilies
1 tsp. garlic salt
1/2 tsp. hot pepper sauce
1/4 tsp. salt
1/4 tsp. ground cumin
3 tubes refrigerated crescent rolls

In a skillet, cook beef and onion over medium heat until the meat is no longer pink; drain.  Add the cheese, salsa, chilies, garlic powder, hot pepper sauce, salt and cumin; mix well.
Unroll crescent dough and separate into 12 rectangles.  Place on ungrease baking sheets; press perforations to seal.  Place 1/2 Cup meat mixture in the center of each rectangle.  Bring four corners to the center and twist pinch to seal.  Bake at 350 degrees for 20-25 minutes or until golden brown.


I did a few things differently with these taco twists.  I did not add chilies or the ground cumin.  I added crushed red pepper instead.  I didn't feel like anything was missing with these items left out.  There was still plenty of flavor!  These could be an awesome appetizer or full meal.  They are easy to handle as finger food or to eat with a fork!  They were really fun to make and fun to create!  Enjoy!

Wednesday, August 3, 2011

Chili Tots

After being on vacation for a while and very busy before vacation I  haven't tried any new recipes lately, which my boyfriend reminded me of. ha ha.  Since we are finally back into the swing of normal life I will be cooking more again!  So, to get back into the swing of things i decided to try out this new recipe! 

Chili Tots

Prep 15 minutes                  Bake 35 minutes          Yield: 2 Casseroles, 6 servings each

1 lb. ground beef
2 cans (15oz each) chili without beans
1 can (8oz) tomato sauce
1 can (2 1/4oz) sliced ripe olives, drained
1 can (4oz) chopped green chilies
2 Cups shredded cheddar cheese
1 package (32oz) frozen Tater Tots

In a large skillet, cook beef over medium heat until no longer pink; drain.  Stir in chili, tomato sauce, olives, and chilies.  Transfer to two greased 8 inch square baking dishes.  Sprinkle with cheese and top with Tater Tots. Cover and freeze one casserole for up to 3 months. 

Cover and bake the other casserole at 350 degrees for 35-40 minutes or until heated through.

To use frozen casserole: Remove from the freezer 30 minutes before baking (do not thaw).  Cover and bake at 350 degrees for 1 1/4 to 1 1/2 hours or until heated through.


This was a quick and easy recipe to make.  I did change a few things.  Instead of using beef, I used lean ground turkey!  You couldn't tell the difference and it is a healthier alternative.  I also did not put the green chilies in.  It was a very flavorful dish and the chili was not overpowering.  The olives were an added bonus of flavor that was quite surprising.  Make sure the Tater Tots are a crispy and the casserole is bubbling before you take it out.  If you want to make 1 big casserole just put it all in 1 dish instead of 2!  I hope you enjoy this recipe as much as we did! 

  I served with green beans cooked with garlic.

Thursday, July 14, 2011

Chocolate Eclair Squares

Looking to hook a man?  This is the first dessert I ever made for my boyfriend and we are still together!  It is easy to make and absolutely delicious.  It really tastes just like an eclair!  These squares are cool and light and the perfect way to end any meal.  

Chocolate Eclair Squares

2 Cups cold milk, divided
1 pkg. (4 serving size) Vanilla Flavor Instant Pudding and Pie Filling
1 tub (8 oz.) Cool Whip, thawed
22 Graham crackers
4 Squares Bakers's Unsweetened Baking Chocolate
1/4 Cup (1/2 stick) butter or margarine
1 1/2 Cups powdered sugar

Pour 1 3/4 Cups of the mile into a large bowl.  Add dry pudding mix.  Beat with wire whisk 2 min.  Gently stir in Cool Whip.  Layer 1/3 of the grahams and half of the cool whip mixture in a 13X9-inch pan, breaking grahams as necessary to fit.  Repeat layers.  Top with remaining grahams.

Microwave chocolate and butter in medium microwaveable bowl on High 1 1/2 min, stirring after 1 minute.  Stir chocolate until completely melted and smooth.  Add powered sugar and remaining 1/4 Cup of milk.  Stir until well blended.  Immediately spread over grahams. 

Refrigerate at least 4 hours or overnight.  Store any leftovers in the fridge. 

Makes 24 servings, 1 square each.

This recipe is great just the way it is!  The first time I made it I barely let it sit 4 hours.  It did set but the graham crackers were still a bit crunchy.  My boyfriend prefers it with a bit of crunch, whereas if you let it sit longer, the graham crackers will be soft.  Both ways are equally delicious in my opinion!  I have often thought it would be fun to try different types of pudding flavors instead of vanilla though.  I love pistachio pudding so when I make this again I think I will use pistachio.  Also, for chocolate lovers, you could use chocolate pudding.  Have fun with this recipe and I promise, anyone who tries this will instantly love it! Enjoy!

Tuesday, July 12, 2011

Crunchy Peanut Butter Balls

I had a container of marshmallow creme I wanted to use up so I searched for desserts with it in it.  I like to make the guys at my boyfriends work things to eat once in a while.  I found this recipe and it sounded great and looked very quick and simple to make.  Plus I had most of the ingredients already!

Crunchy Peanut Butter Balls

  • 1 cup peanut butter
  • 1 (7 ounce) jar marshmallow creme
  • 1 1/2 cups crisp rice cereal
  • 1 1/2 cups semisweet chocolate chips
  • 4 teaspoons shortening
  1. In a large bowl, combine the peanut butter and marshmallow creme; add cereal and stir until well coated. In a small microwave-safe bowl, combine chocolate chips and shortening. Microwave, uncovered, for 1-2 minutes or until chips are melted; stir until smooth.
  2. Roll cereal mixture into 1-in. balls; dip in chocolate. Place on a waxed paper-lined pan. Refrigerate until set. 
This recipe is very quick and fun to make.  If you have children this would be a great recipe to do with them.  Instead of dipping them in chocolate you could dip them in peanut butter sauce and drizzle with chocolate or dip them in chocolate and drizzle with peanut butter sauce.  You can also put any type of nut on the outside or drizzle with white chocolate.  There are many ways to decorate the peanut butter balls so have fun and get creative!  These are very delicious and everyone who tried them loved them!  I will definitely make these again! Enjoy!

Monday, July 11, 2011

Velveeta Tex-Mex Beef and Potatoes

This is a great hearty recipe that is quite filling.  This recipe makes a lot of food and is perfect for a family.  The flavors are wonderful and the perfect meal after a long day of working.

Velveeta Tex-Mex Beef and Potatoes

Prep 10 min         Preheat oven to 350 degrees             Makes 6 servings

1 lb. ground beef
1 red or green bell pepper, chopped
1 onion, chopped
1 pkg (1 1/4 oz) Taco Seasoning Mix
1/2 Cup water
4 Cups frozen Southern-style hash browns (cubed not shredded variety)
1 pkg (10 oz) frozen corn
1/2 lb. (8oz.) Velveeta Cheese, cut into 1/2 inch cubes

Brown meat with peppers and onions in large skillet on medium-high heat, stirring occasionally to break up the meat; drain.  Return  meat mixture to skillet. 
Add taco seasoning mix and water; stir until well blended.  Stir in potatoes, corn, and Velveeta.  Spoon into 13X9-inch baking dish; cover with foil.
Bake 20 min.  Uncover; stir gently.  Bake. uncovered, an additional 15 min. or until heated through.

I have done this recipe a bit differently.  I do not like peppers so I have never added peppers to this.  It is still just as tasty and delicious!  Also, I have just made this on the stove instead of putting it in the oven.  Brown the meat with the peppers, drain and return to large skillet.  Add taco seasoning, water, potatoes and corn.  Stir until blended.  Cover and cook on medium heat 5-7 min or until potatoes are tender.  Stir in Velveeta, cook uncovered, until Velveeta is completely melted and mixture is well blended, stirring occasionally.  This way is quite a bit quicker and just as delicious!  I hope you enjoy this recipe as much as I do!

Thursday, July 7, 2011

Parmesan Baked Salmon

This is my absolute favorite salmon recipe!!!  It truly is a delicious recipe that surprises everyone with its flavor.  I originally tried it out to have something different and ended up falling in love!  People who do not really like salmon will like this recipe.

Parmesan Baked Salmon

Prep time: 10 min

1/4 C. Mayonnaise
2 TBSP grated parmesan cheese
1/8 ground red pepper (cayenne)
4 Salmon fillets, skin removed
2 tsp. lemon juice
10 Ritz crackers, crushed

Heat oven to 400 degrees.  Mix mayo, parmesan cheese, and pepper. 
Place fish in foil lined baking pan.  Top with lemon juice followed by mayo mixture and then cracker crumbs.
Bake 12-15 min or until fish flakes easily with a fork

 This recipe is quick and easy and fun to play with.  I add extra lemon juice sometimes but don't go overboard.  After making this recipe once i never measure anymore.  I also use roasted garlic and bell pepper seasoning blend (from McCormick) instead of ground red pepper.  It is absolutely delicious and the garlic adds so much flavor.  I also buy salmon fillets that are boneless and skinless so i don's have to mess around with any of that!  I hope you enjoy this recipe as much as I do!

Tuesday, June 28, 2011

Lasagna Roll-Ups

This is a great recipe from your leftover lasagna ingredients or if you have leftover ricotta cheese and lasagna noodles.  I came up with this after having too many cooked lasagna noodles and leftover ricotta cheese after making lasagna a while ago.  This time i had leftover plain ricotta cheese and lasagna noodles in the cupboard.  It is a quick recipe to have fun with and i never measure my ingredients when I am making this.

Lasagna Roll-Ups

Preheat oven to 375 degrees.  Bake 25-30 minutes.

Lasagna noodles, cooked
Ricotta Cheese
1 Egg
Basil or Italian seasoning
Parmesan Cheese
Mozzarella cheese
Spaghetti Sauce

Mix ricotta cheese, egg, basil, Parmesan cheese as desired, and mozzarella cheese as desired.  Cut Lasagna noodles in half.  Put a dollop of ricotta cheese mixture on the lasagna noodle followed by a pinch of mozzarella cheese.  Roll up and place seam down in a greased pan.  After you are finished, cover in sauce and sprinkle with parmesan cheese.  Bake!


If you are sick of lasagna you can make these and freeze them for a later date.  Just do not add the sauce before you freeze them.  These are something different and fun, packed full of flavor!  You can add meat to them if you want or you can add different cheeses and seasonings.    Enjoy

Strawberries and Cream Pie

I got this recipe from my grandma Carol Trostle.  The original recipe is Peaches and Cream Pie.  I changed it and added strawberries instead!  My grandma used to make this and when I was around I would always ask her to put extra cream in it because it was so delicious!  This pie is something different and it is just great!  I will give you both recipes for peaches and strawberries.

Peaches and Cream Pie or Strawberries and Cream Pie

Preheat oven to 400 degrees.         Bake 35-45 minutes or until it sets

Peeled Ripe Peach Halves or 1 Quart strawberries stems removed and sliced
Filling:                  9"                                      8"
                       7-8  peach halves               6 peach halves
                       2/3 C. Sugar                       1/2 C. Sugar
                       4 TBSP flour                      3 TBSP flour

Cream            1/4 tsp salt                          1/4 tsp salt
                      1/2 tsp cinnamon                1/3 tsp cinnamon
                      1 C. cream                          3/4 C. cream

Mix together peach halves, sugar, and flour.  Arrange Peach halves rounded side up in pastry-lined pan.  Pour cream mixture over peaches and bake.
-or-
Mix strawberries, sugar, and flour.  Put into pastry-lined pan.  If there is excess liquid from strawberries do not allow it into the pan.  Pour cream mixture over strawberries and bake.  The strawberries and cream pie might take longer to bake and set. 
For both pies, put tinfoil around crust if it gets too brown. You don't want it to burn.

 The brown you are seeing on top is just the cinnamon.

I let the strawberries sit over night which made them have too much juice.  So, do not let them sit overnight.  Prepare them and use them right away.  I added all the juice and the cream and it was too much.  It took the pie forever to bake and set.  The strawberries and cream pie was absolutely delicious though and everyone who ate it enjoyed it.  Have fun with this recipe and add whatever other fruit you would like to try!  Enjoy!

Bacon-Cheese Stuffed Shells

I got this recipe from my boyfriend's sister, Colbie!  She wanted me to try it out for her to see if it was worth making.  Since it yields 12 servings i decided to make it for their family for dinner one night.  Turns out this recipe is delicious!  It was a little pricey to make but it was worth it.  The flavors are unbelievable.  You might be expecting regular tasting stuffed shells when you bite into them but that is not what you will get.  The combination of cheeses, bacon, mushroom, and onion is just wonderful!  I would definitely make this again.  The whole family love them!

Bacon-Cheese Stuffed Shells


Prep: 45 min Bake: 40 min Yields: 12 servings
24 uncooked jumbo pasta shells
1 cup chopped fresh mushrooms
1 cup finely chopped onion
1 Tbsp plus 1/4 cup butter, divided
1-1/2 cups ricotta cheese
1 pkg (8oz) cream cheese, softened, divided
1-1/2 cups shredded Asiago cheese, divided
1 cup shredded Parmesan cheese
1 cup crumbled cooked bacon
2 Tbsp minced fresh parsley, divided
1/2 tsp garlic salt
1/2 tsp ground nutmeg
1/2 tsp pepper
2 Tbsp all-purpose flour
2 cups heavy whipping cream
1/2 cup chicken broth
1/2 cup milk (2%)
2 cups shredded Romano cheese
1-1/2 cups shredded part-skim mozzarella cheese

Cook pasta according to package directions. Meanwhile, in a large skillet, saute mushrooms and onion in 1 Tbsp butter until tender.
In a large bowl, beat ricotta and 4oz cream cheese until blended. Stir in 1/2 cup Asiago cheese, Parmesan cheese, bacon, 1 Tbsp parsley, garlic salt, nutmeg, pepper and mushroom mixture. Spoon into shells; place in a greased 13'x9' baking dish.
In a large saucepan, melt remaining butter. Stir in flour until smooth; gradually add the cream, broth and milk. Bring to a boil; cook and stir for 1-2 minutes or until thickened.
Stir in Romano cheese and the remaining cream cheese, Asiago and parsley. Pour over shells. Sprinkle with mozzarella cheese. Cover and bake at 350 for 30 minutes. Uncover; bake 10-15 minutes longer or until bubbly.

 This is what was leftover from a large pan of shells made!

 I used my own fresh sweet basil in this recipe and it worked out great. This was the first time i have used fresh basil.  I got these basil plants from my friend Amylynn's dad who knew i liked to cook.

The only thing I did differently from the recipe was that i added more cream cheese to the shell mixture and less to the white sauce on top.  This was my mistake as I did not read the recipe correctly.  I do not think it changed the taste that much though so I would just use the recipe as it stands!  Enjoy! 

Wednesday, June 22, 2011

Salmon Broccoli Bake

I found this recipe and it sounded delicious!  I wanted to make it because i thought it would different from your everyday chicken or beef.  I love salmon but my boyfriend doesn't like it that much.  The first time i told him i was going to make it he didn't want it...so i waited a few days and told him i was making a surprise dinner.  I wouldn't tell him what i was making and i asked him to stay out of the kitchen.  When i served it to him before telling him what all was in it, he had already decided it was delicious!  He had second helpings and took it for lunch the next day!

Salmon Broccoli Bake
Prep: 15 min               Bake: 35 minutes               Preheat: 350 degrees

1 Cup chopped onion
1 Tbsp. butter
1-1/2 Cups cooked wild rice
1 Can (7.5oz) salmon, drained, bones and skin removed
1 Egg
1/2 Cup mayonnaise
1/2 Cup grated Parmesan cheese
3 Cups frozen chopped broccoli, thawed and drained
1-1/2 Cups (6oz) shredded cheddar cheese, divided

Prepare rice as directed.  In a skillet, saute onion in butter until tender.  Remove from the heat;  Stir in rice and salmon.  Combine egg and mayonnaise; add to the salmon mixture.  Spoon half into a greased 2-qt baking dish.  Top with half of the Parmesan cheese and broccoli.  Sprinkle with 1 cup cheddar cheese.  Top with the remaining salmon mixture, Parmesan cheese and broccoli.  Bake, uncovered, at 350 degrees for 30 minutes.  Sprinkle with remaining cheddar cheese.  Bake 5 minutes longer or until cheese is melted.

I did all kinds of things differently with this recipe and it came out great!  The first thing I did was I had 1/2 Cup extra rice because the rice mix I used had 2 Cups in it.  This made the dish a little more hearty.  Therefore to compensate next time I would add 1/4 Cup more mayonnaise to make sure the rice and salmon do not get too dry.  I also used broccoli florets instead of chopped broccoli.  Therefore, i layered mine a bit differently.  I put half the salmon mixture down, then the Parmesan cheese and all the broccoli florets, and then the cheddar cheese.  I then put the other half of the salmon mixture on it and covered it with Parmesan cheese and baked it.  It still came out delicious!


This was my first time ever using canned salmon!  I thought it was going to be chunks of salmon...to my surprise it was part of a salmon, with the backbone, rolled up into a can.  Needless to say, i was a little shocked and grossed out.  I had to take the skin off and remove the spine and little bones.  It was a bit of a hassle making sure none of them got into my food.  If i were to make this recipe again, i would just use boneless, skinless, salmon filets and chunk them up!  I hope you enjoy this recipe as much as we did!  Enjoy!

Tuesday, June 21, 2011

Pizza Dip

I made this recipe for Father's Day at my boyfriends house.  It went over pretty good.  It does taste just like pizza!  I did a few things differently but they worked out great!  This is a crock pot dip, so you just throw everything in the crock pot and let it cook!

Pizza Dip
Cook time: 1 1/2 to 2 hours

2 pkgs (8oz each) cream cheese, cubed
1 can (14oz) pizza sauce
1 pkg (8oz) sliced pepperoni, chopped
1 can (3.8oz) chopped ripe olives, drained
2 Cups (8oz) shredded part-skim mozzarella cheese
Bagel chips or garlic toast

Place the cubed cream cheese in a 3 qt. slow cooker.  Combine the pizza sauce, pepperoni, and olives; pour over cream cheese.  Top with mozzarella cheese.  Cover and cook on low for 1 1/2 to 2 hours until cheese is melted.  Stir.  Serve with bagel chips or garlic toast.

Yields: 5 1/2 Cups

This is the picture of the dip before i stirred it all together.  You are seeing the sauce bubble up with the mozzarella cheese on top.

Since everyone does not have a love for black olives like I do, I did not add the black olives into the sauce and pepperoni mixture.  I just halved them and put them on the side.  I also chopped some onion and cooked it a little and put that on the side.  It turned out good and people could just add the toppings that they wanted.  You could also do this with any of your favorite pizza toppings to add some flavor and pizzazz to your pizza dip.  You could add them into the dip or just leave them on the side.  To dip with i got the garlic bagel chips and i also got a loaf of garlic bread.  I baked the bread like you normally would and then cut it into pieces.  People seemed to definitely enjoy the garlic bread the most and they could load it up with toppings!  I hope you enjoy!

Monday, June 13, 2011

Cheesy Bacon Pinwheels

These are the best pinwheel appetizers.  They are so easy to make and they are a crowd-pleaser.  I first made them for a group of my college friends and they were a big hit.  I then made them for my family and they absolutely love them!!!  I recently made them for my boyfriends family and they too thought they were excellent.  So, if you want to please someone with a tasty and good-looking appetizer then i would make these!

Cheesy Bacon Pinwheels

Prep time: 30 min                       Bake time: 12-15 minutes

1 pkg. Philadelphia Cream Cheese, softened
8-9 slices of Bacon, crisply cooked and crumbled
1/2 C. grated Parmesan cheese
1/4 C. finely chopped onion
2 Tbsp. parsley
1 Tbsp. milk
2 Cans refrigerated crescent roles

Heat oven to 375 degrees.
Mix all ingredients except dough
Separate each can of dough into 4 rectangles; firmly press perforations together to seal.  Spread each rectangle with 1/4 of cream cheese mixture leaving a little space at one end.  Roll the doll and seal the end down.  Cut the dough into 4-5 pinwheels and re-shape them if needed.  Place the pinwheel on a greased baking sheet. 
Bake 12-15 min.

When you make this recipe I would recommend using Philadelphia cream cheese, because other cream cheeses change the flavor a bit.  Make sure the cream cheese is softened and mix it up before you start, that just makes it easier to work with.  I would also recommend using regular crescents, not the Jumbo ones.  My mom used the jumbo crescents once and there was too much breading and they did not work out the same.  Have fun with this recipe and add extra bacon or Parmesan cheese.  Sometimes I also add an extra half a block of cream cheese to add more filling and also increase the bacon amount and milk amount.  You really cannot mess this recipe up so enjoy!

Friday, June 10, 2011

White Pretzel Salad

Well here it is, White Pretzel Salad!  Ive had so many people ask for this recipe after they try it.  People are  sometimes wary of it when they see it but once they try it they are hooked.  It is absolutely delicious! I made it last night for a dinner with my boyfriend's family.  My boyfriend and his father are convinced this is a dessert but it technically is a salad.  You can use it for whatever you want though.  His mother enjoyed it again for breakfast the next morning, which I have also done many times!
I believe this recipe either came from my mother or grandmother.  They both made it for many functions including both my sister and I's high school graduation parties.  It is a great, light dish to bring with you that everyone will enjoy and it is easy to double and triple!  Just make sure you do not add the pretzels until right before you serve because they will get mushy if they sit in there too long.

White Pretzel Salad

1/2 C. broken pretzel sticks
1/2 C. butter melted
1/3 C. Sugar

Melt butter and add sugar.  Spread broken pretzel sticks on cookie sheet and add melted butter and sugar.  Stir until all pretzels are coated.  Re-spread on cookie sheet so there is only 1 layer.  Bake at 400 degrees for 5 minutes.  Remove and let cool.  Break up more.

8 oz cream cheese
1/2 C. sugar
1 20 oz Can crushed pineapple, drained
12-16 oz Cool Whip

Allow cream cheese and cool whip to soften before use.  Beat cream cheese until smooth. Add sugar and stir together.  Drain pineapple thoroughly (this is very important because you do not want too much pineapple juice) and add to cream cheese and sugar.  Fold in Cool Whip.  Add crushed pretzels right before you serve so they do not get mushy. Enjoy!

                               *pretzels with sugar and butter on them

Wednesday, June 8, 2011

Spiral Pepperoni Pizza Bake

I made this new recipe last night after my boyfriend saw a picture of it on the front of one of my cookbooks.  He said it looked delicious and asked if I would make it for dinner the next night.  I of course agreed because i love trying new things!  here's the recipe!

Spiral Pepperoni Pizza Bake

Prep: 30 minutes                                Bake: 40 minutes

1 pkg (16oz) spiral pasta              
2 lbs ground beef                        
1 large onion, chopped                 
1 tsp salt                             
1/2 tsp pepper                               
2 cans (15oz each) pizza sauce
1/2 tsp garlic salt
1/2 tsp Italian seasoning
2 eggs
2 Cups milk
1/2 Cup shredded Parmesan Cheese
4 Cups shredded part-skim mozzarella cheese
1 pkg (3-1/2 oz) sliced pepperoni

Cook pasta according to package directions.  Meanwhile, in a Dutch oven, cook beef, onion, salt, and pepper over medium heat until meat is no longer pink; drain.  Stir in pizza sauce, garlic salt, and Italian seasoning; remove from heat and set aside.
In a small bowl, combine the eggs, milk, and Parmesan cheese.  Drain pasta; toss with egg mixture.  Transfer to a greased 3-qt baking dish.  Top with beef mixture, mozzarella cheese and pepperoni.
Cover and bake at 350 degrees for 20 minutes.  Uncover; bake 20-25 minutes longer or until golden brown. 

After making this recipe I would do a few things differently.  The first thing is that I would not use a whole 16oz bag of noodles.  I would cut it down to 3/4 of a bag.  The second thing I would do is not add the garlic salt and Italian seasoning to the pizza sauce.  Although it tastes good, adding the 2 seasonings makes the pizza sauce taste like spaghetti sauce.  I would have preferred to taste more of a pizza sauce.  The third thing i would have done is I would add a small amount of salt to the egg mixture to give it a little more pizzazz.  My last suggestion is to make sure you use the full amount of pizza sauce and use more then less if you have to.  The noodles in the bottom are a little bland without the sauce.  Overall this was a good recipe and I would make it again.  It was quick and easy to make. My boyfriend loved the top with the mozzarella cheese and pepperoni.  

Tuesday, June 7, 2011

Cheesy Biscuits

This recipe came from Paula Deen.  My Poppy and I were watching her one day on television and came across this recipe.  we decided right there and then to make them for dinner that night.  we added a little extra cheese to the biscuits and they turned out delicious!!! i also have noticed with this recipe you may need to add more water to the biscuits if they are too dry.  these taste like the biscuits from red lobster!  enjoy!

Cheesy Biscuits
1 1/2 C. bisquick
1/2 C. Shredded Cheddar Cheese
1/2 C. Water (you may need to add a little more depending on consistency)

Preheat oven to 400 degrees. Mix top 3 ingredients together and drop by spoonful on greased cooking sheet. Bake 10 min.  Add together bottom 4 ingredients and put on top of biscuits.

Topping:
3 TBSP Melted Butter
As Desired: Parsley
                    Garlic Powder
                    Salt

Beginning my Blog

hello!  this is the first blog i have ever written and i am so excited to get started on it.  this blog will be primarily about cooking!!!  i love to cook and try new recipes so i decided that i would share the new recipes i try with you!  cooking was instilled in me as a young child.  the first thing i ever made was scrambled eggs!  i always enjoyed cooking with my great grandfather and my grandparents and i know they loved having me in the kitchen with them.  i am inspired by some of my family's recipes as well as people like Paula Deen!  i just love her!  i hope you enjoy food as much as i do and learn new things with me as i cook! enjoy!